1:1 Fuel Tank
Stage A: Preparation, in this stage, we are going to form a group of 10, choose our 1:1 fuel tank, then create a template first.
Tools: Computer software, Laser Cut machine, 6mm thick plywood boards.
Step 1: Form a group of 10, then choose our 1:1 tank.
The fuel tank we choose is
Custom tank for a CB550: Andrew Wallace, which has a multiplication factor.

Step 2: use the file and software to create a template.
In this step, we use Slicer for Fusion 360 to make the 3D model to be an assembled template with multiple 2D plans.


When we get the 2D plans, generate the 2D sheets to pdf and then use Adobe Illustrator to set the factors of laser cutting.
Laser cutting

Step 3: Assemble. After we get all template sheets, we assemble them carefully.
Assemble finished fuel tank template.


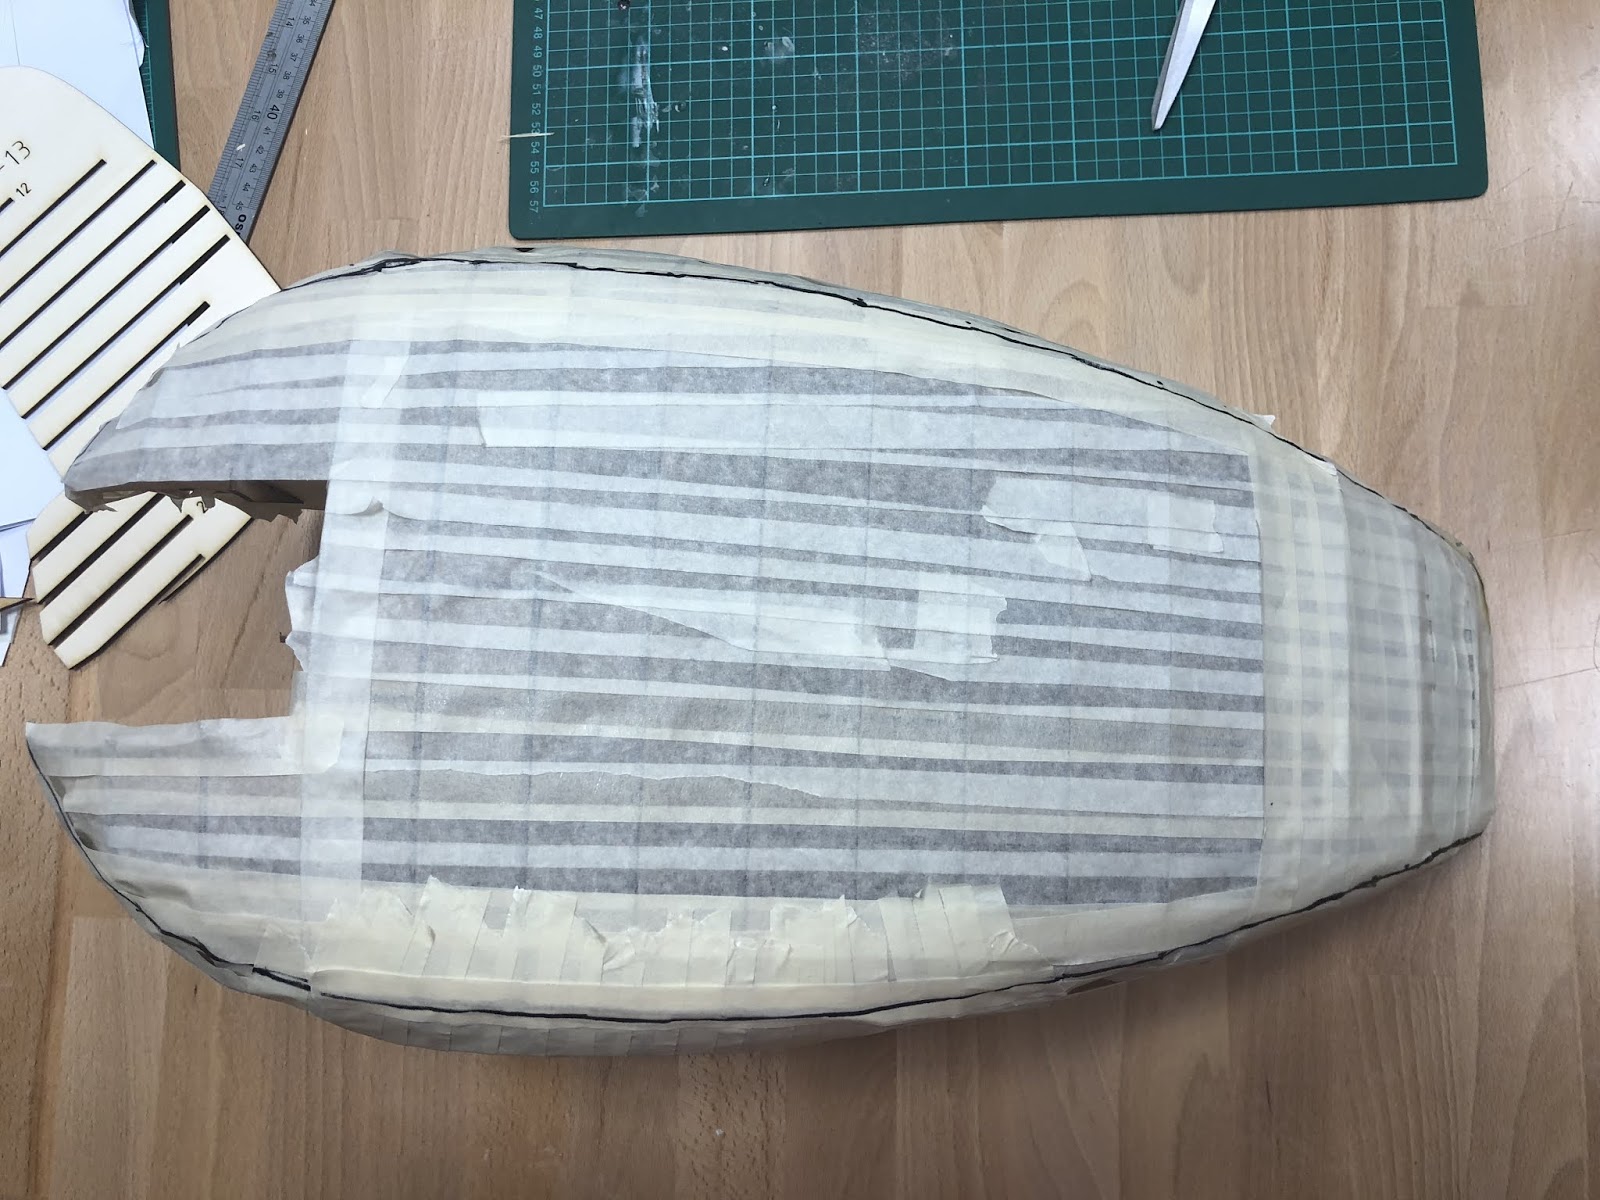
Stage B: Dividing the part of model. In this stage, we are going to divide the model to 3 part so that we can do our third of fuel tank individually.
Tools: Masking Tape
Step 1: wrap the model
We use masking tape only to wrap the model, so that it will be easy for us to divide the part of model.


what I am going to make,
is this top surface, the biggest one,
I'm going to make this individually.
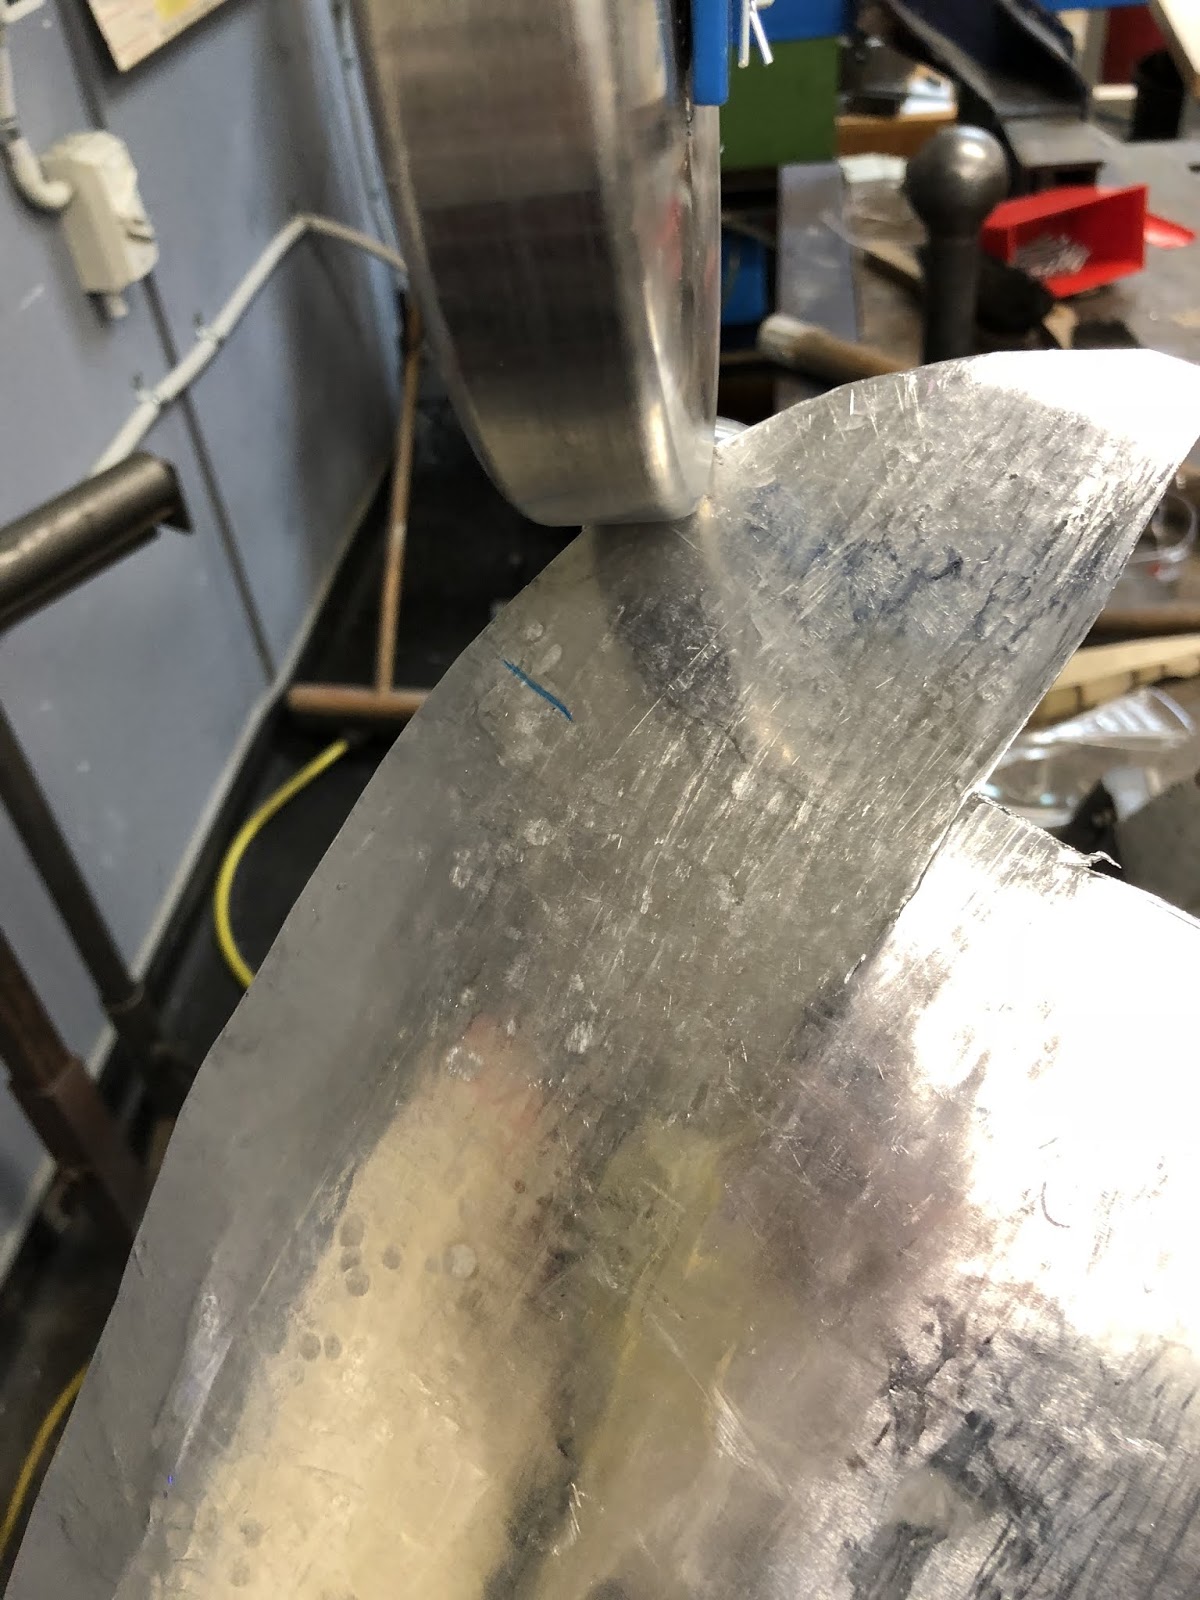
Stage C: Making. In this stage, is the most important part of this assessment, I'm going to creating a top surface by aluminum sheet. It needs time, patient and power...
Tools: Aluminum sheet, Melee Hammer, Planishing Hammer, English Wheel, Dolly Tool, Plywood Model Template.
Step 1: I decided to use melee hammer to hammer the edge to create the curve, it is very hard to achieve because when I hammer the edge, the overall curve of this top surface will also change. I can only repeat this step again and again to make this looks like perfect.


 looks like it get a acceptable curve.


Use English Wheel to make the edge looks better.


However, the hardest park of making this surface is hard to control the overall curve. I use English Wheel to improve this curve.

Repeat step 1& 2 to achieve a perfect curve of overall and edges, this will cost many time, needs patient.


Processing, it looks like my top surface is ok, but my partner needs do something with their work.

Final.
Finished product, t


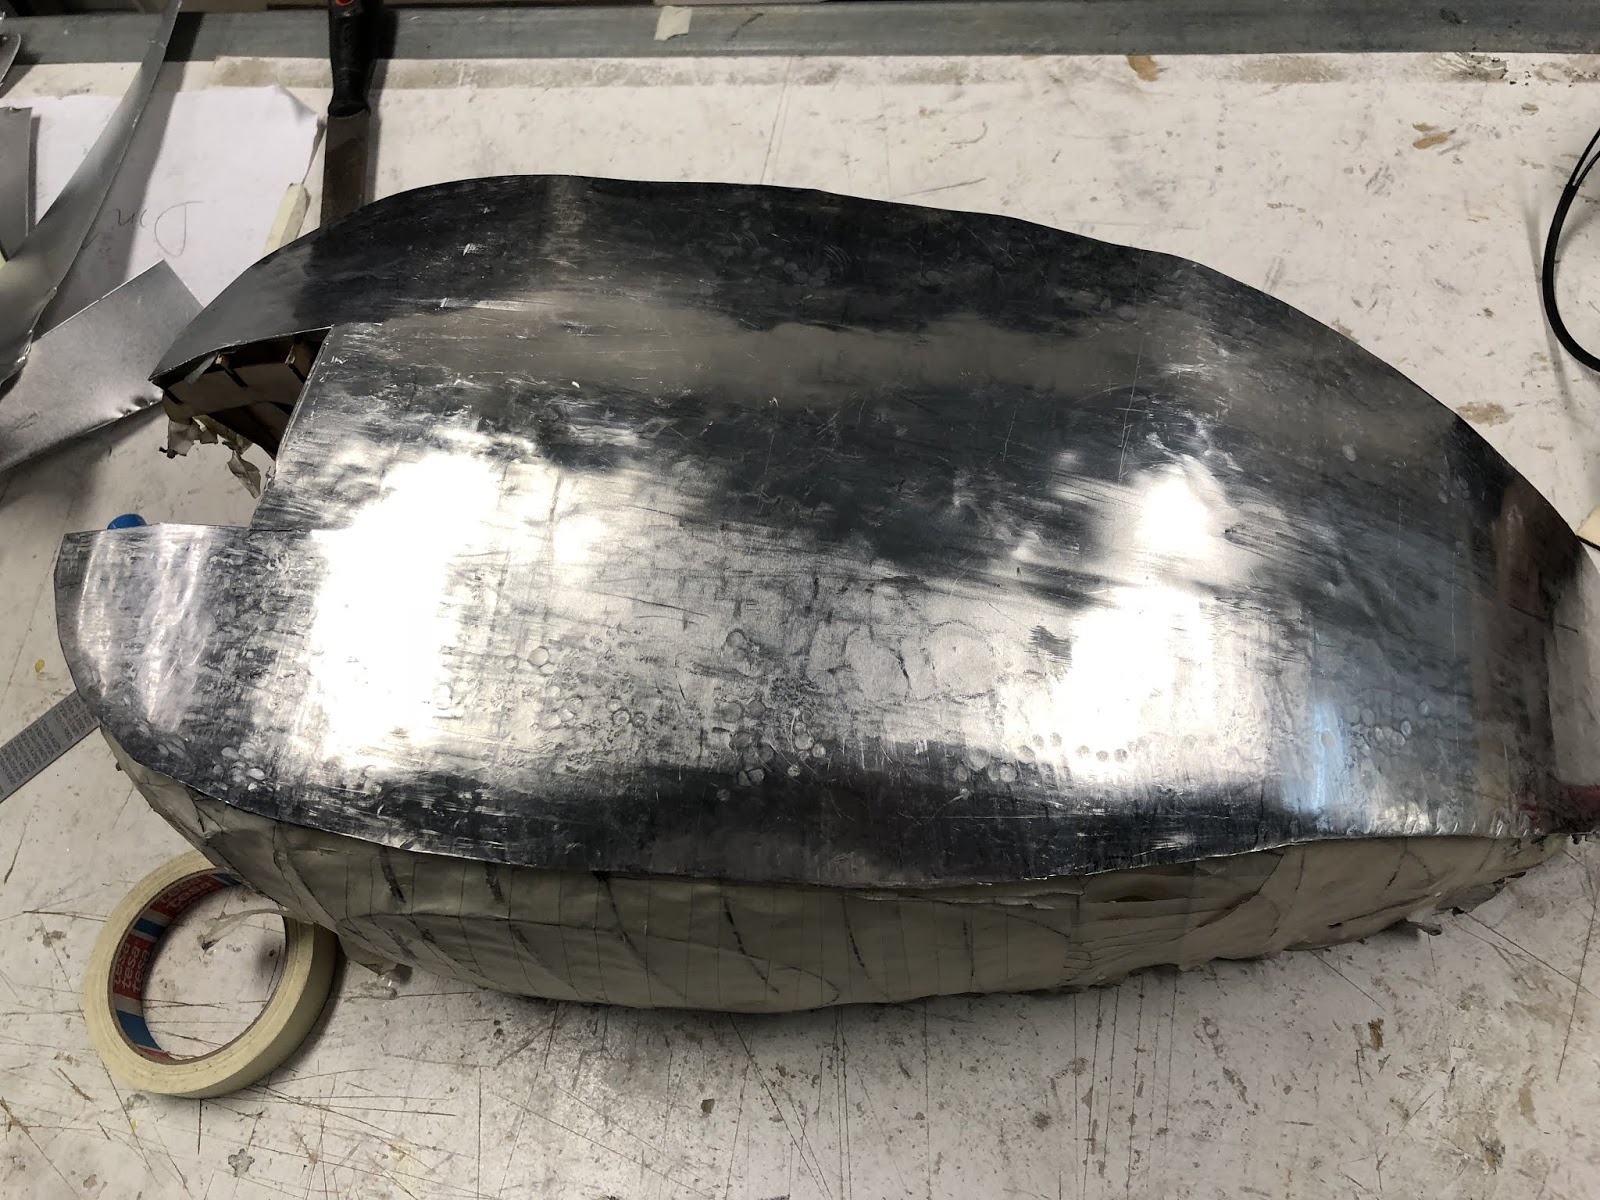


join together and cut off unnecessary edge.


评论
发表评论